Tips For Deleting Quick Email Search from Windows 7
Errors generated by Quick Email Search 0x80246002 WU_E_DM_INCORRECTFILEHASH A download manager operation could not be completed because the file digest was not recognized., Error 0x80240031, 0x8024A002 WU_E_AU_NONLEGACYSERVER The old version of the Automatic Updates client has stopped because the WSUS server has been upgraded., Error 0x80246017, 0x0000002F, 0x0000001F, 0x00000021, 0x000000A5, 0xf0809 CBS_E_ARRAY_ELEMENT_MISSING attempt to get non-existent array element, 0x8024000B WU_E_CALL_CANCELLED Operation was cancelled., 0x8024F003 WU_E_INVALID_EVENT The XML in the event namespace descriptor could not be parsed., 0x8024400C WU_E_PT_SOAP_MUST_UNDERSTAND Same as SOAP_E_MUST_UNDERSTAND - SOAP client was unable to understand a header., 0x80248019 WU_E_DS_NEEDWINDOWSSERVICE A request to remove the Windows Update service or to unregister it with Automatic Updates was declined because it is a built-in service and/or Automatic Updates cannot fall back to another service.Get Rid Of Quick Email Search Assistance For
A threat like Quick Email Search damage the whole OS and make other install program unresponsive. This threat is very risky for the all Windows version including the newly released Windows 10 OS. The malicious mind behind the creation of this Quick Email Search threat is used to hamper more and to steal useful resource from the infected OS. On every web browser there is option to save password, this is done for the user convenience. The hacker will attack on those web browser, mainly on the default one to collect those saved password. It can be off your social account, email, or even on banks.
Which is the reason you must Uninstall Quick Email Search virus from your infected OS. Moreover this threat will compromise the security program of the infected OS, which allow other harmful threat to enter. As the OS is already infected with Quick Email Search, therefore the other threat will surely damage all the functionality of your OS. Which is why you must need to Uninstall it.

Step 1 : Uninstall Quick Email Search From Web Browser
Step 2 : Reset Your Browser Settings To Uninstall Quick Email Search
Step 3 : Uninstall Quick Email Search From Task Manager
Step 4 : Uninstall Quick Email Search From Registry Editor
Step 5 : Uninstall Quick Email Search Through Control Panel
Step 6 : Start Your PC in Safe Mode With Networking To Uninstall Quick Email Search
Step 1 : Uninstall Quick Email Search From Web Browser
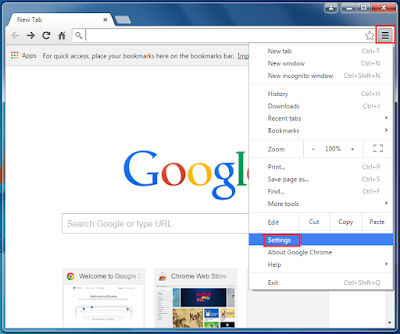
Uninstall From Google Chrome
- To open Menu click on 3 Horizontal icon top right corner of Chrome Browser.
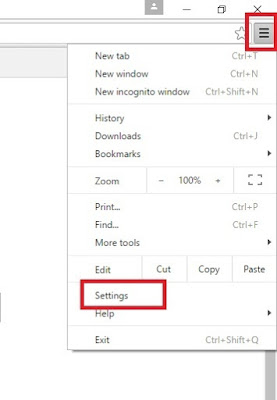
- A drop Down list will open >> select the Settings/ Extension option.
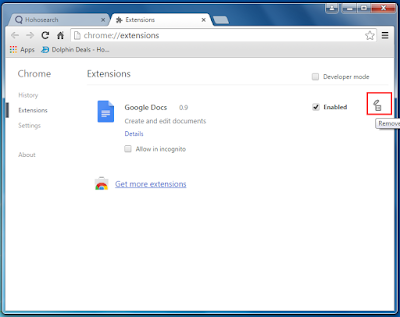
- If Settings panel get open >> then click on Extension Tab.

- If Extension Windows will be open select the malicious extension from the list.
- Then finally click Trash / Recycle icon to Uninstall Quick Email Search from Google Chrome.
Uninstall From Internet Explorer
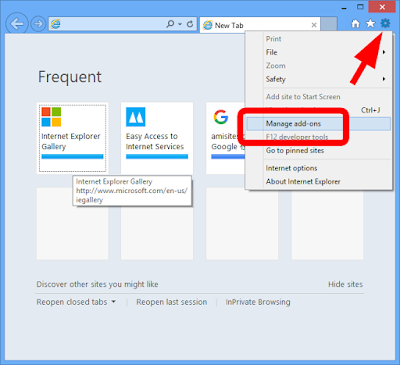
- Select the Tools button from Internet Explorer.
- On the Tools section select Manage add-ons.
- From the Add-ons list, select the add-on you want to turn off/remove.
- The Select Disable option .
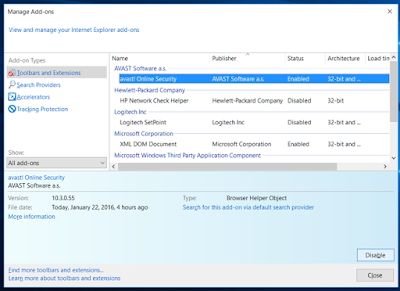
- Now Finally Restart The Internet Explorer to Uninstall Quick Email Search.
Uninstall From Mozilla Firefox
- Click Menu Button then choose Add-ons.
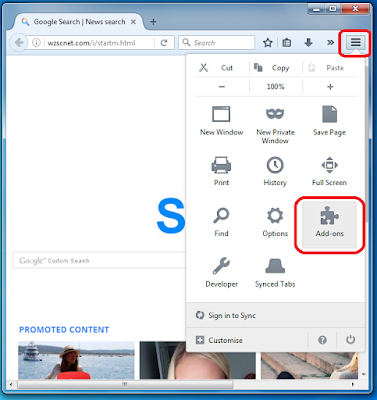
- Now the Add-ons Manager Tab will open.
- Here you need to select the Extensions or Appearance panel.
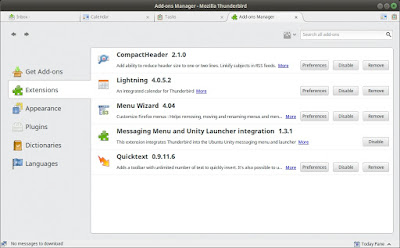
- Then simply select the add-on from list you wish to remove.
- Now click on the Uninstall button.
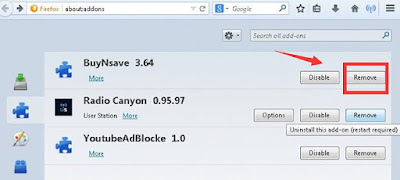
- Finally Restart the Mozilla Browser to Uninstall Quick Email Search.
Uninstall From Microsoft Edge
- Select More option to open the menu on Microsoft Edge.
- Then select Extensions from the Menu drop down list.
- On the Extension right-click on it to Uninstall.

- Now click the Remove button.
- Finally Restart the Microsoft Edge Browser to Uninstall Quick Email Search.
Reset Google Chrome
- Click on Menu from right corner of Chrome Browser.
- A drop list will appear, select Settings from here.
- When Settings panel will appear >> go to search box.
- On Search Box type RESET.
- Click the Reset button when confirmation Pop-up Windows will appear.
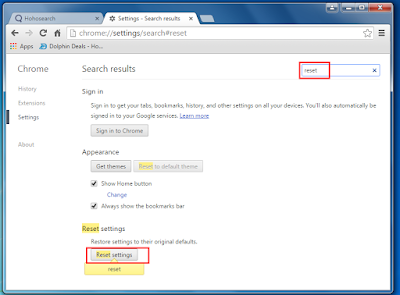
- This will Uninstall Quick Email Search from Google Chrome Browser.
Reset Microsoft Edge
- Click the three horizontal dots to open the Settings menu.
- Then choose Settings option from here.
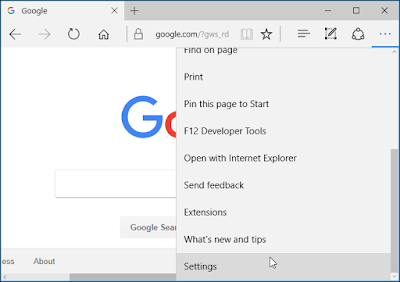
- Then under Settings section click on Clear Browsing Data.
- Here click on Choose what to clear >> then click Show more.
- Select all and click Clear.
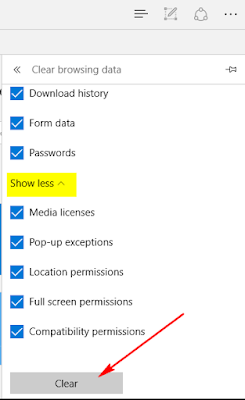
- Restart your Microsoft Edge to Uninstall Quick Email Search.
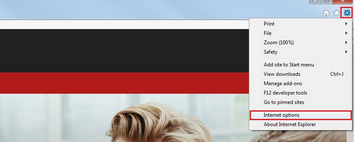
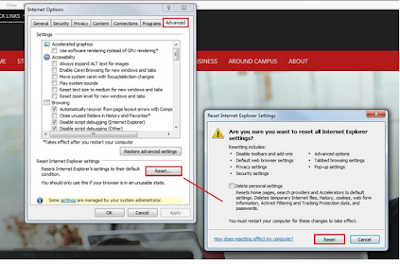
Reset Internet Explorer
- Click on Tools menu and select Internet Option.
- Click on Advance tab and then hit the Reset button.
- Find Delete Personal Settings option and press Reset Button.
- Restart your Internet Explorer to Uninstall Quick Email Search.
Reset Mozilla Firefox
- On Mozilla Firefox click Menu option and then press Help option.
- Select Troubleshooting Information option.

- On this panel click on Refresh Firefox button.
- Press Refresh Firefox to complete the process.
<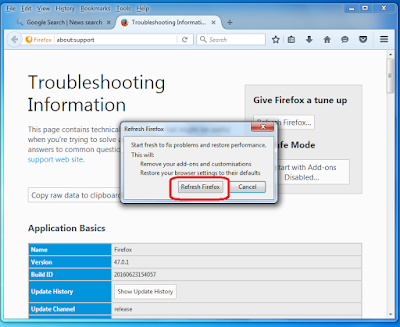
- This will Uninstall Quick Email Search from Mozilla Firefox.

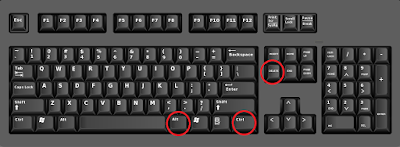
- Right-click on task Bar and select Task Manager.
- Press ALT+Ctrl+Del buttons to open Task Manager.
- When Task Manager will open select the Malicious Task.
- From here click on End Task button to Uninstall Quick Email Search.

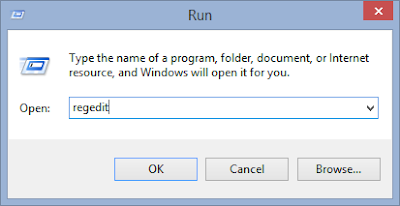
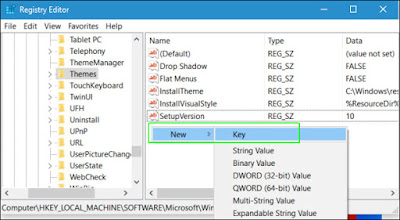
- Press Win + R keys together to open Run Command.
- Type regedit and click OK or Hit Enter.
- Find and Uninstall all related registry files of Quick Email Search.
- HKEY_LOCAL_MACHINESYSTEMCurrentControlSetServicesWpm
- HKEY_CURRENT_USERSoftwareMicrosoftInternet ExplorerMain “Default_Page_URL”
- HKEY_LOCAL_Machine\Software\Classes\[name]
Uninstall Quick Email Search From Windows XP
- Click on Start menu and select Control Panel.
- Now press on Add or Remove programs option.
- Find and Uninstall unwanted program from your PC.
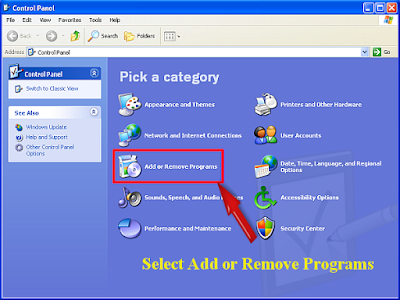
- Then Restart your PC to Uninstall Quick Email Search.
Uninstall Quick Email Search From Windows 10
- Click on Start then select Settings option.
- From Settings section choose System option there.
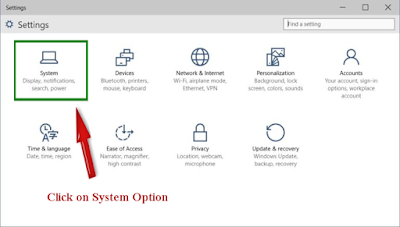
- The click on Apps and Features option.
- Here select the unwanted program and remove from your PC.
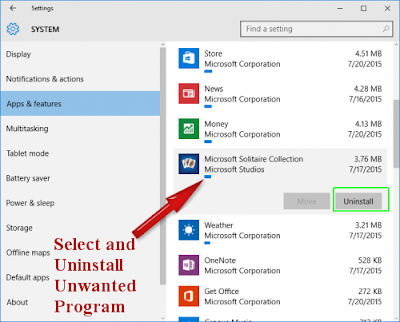
- Restart your PC to Uninstall Quick Email Search.
Uninstall Quick Email Search From Windows 8
- Press Win+R button to open Run Box on your computer.
- Type control panel in Run window and hit Enter button to open Control Panel.
- Click Uninstall a program.
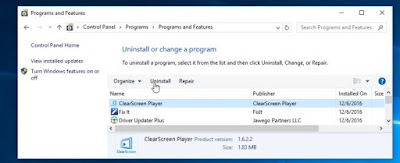
- From this Windows Right-click on Quick Email Search to remove it.
- Restart your PC to Uninstall Quick Email Search.
Uninstall Quick Email Search From Windows 7
- Select Control Panel Option from Start menu.
- Select Uninstall A Programs option from the Programs menu.
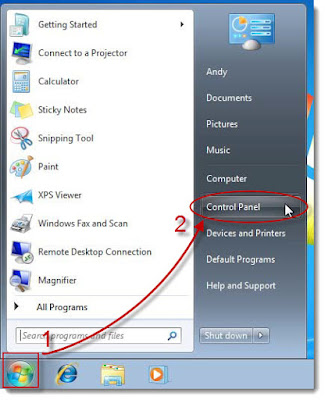
- Finally select and Uninstall unwanted program from your system.
- Then restart your PC to Uninstall Quick Email Search.
Start Windows XP/Vista/7 In Safe Mode To Uninstall Quick Email Search
- To Restart >> Click on Start menu >> select Restart button.
- Continue press F8 button until you don't see the Advance Boot Option.

- On Advance boot menu >> select Safe Mode With Networking Option.
- The press Enter button.

Start Windows 8/10 In Safe Mode To Uninstall Quick Email Search
- To Restart >> Click on Start menu >> press Shift key and the hit Restart button.
- Now as the screen show >> select Troubleshoot option.
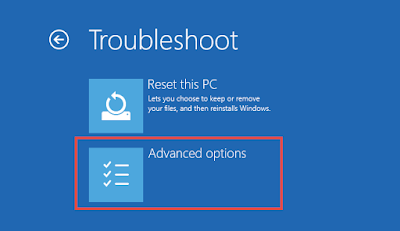
- On the next panel you need to click on Advanced Options.
- The again on new section choose Startup Settings option.
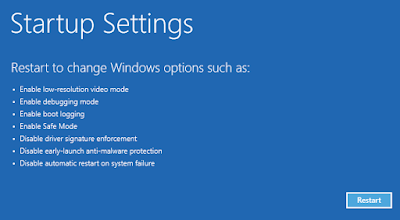
- From here select Enable Safe Mode option and the click Restart button.
No comments:
Post a Comment